Getting Started
Introduction
Welcome to the course "Programming Theory In Practice 2". In this course, you will learn more advanced topics in programming, building upon the knowledge you gained from the previous course. Hopefully this will be useful to those new to programming, as well as to those with an intermediate understanding of programming theory.
For this course, you will need to setup Python on your computer. Python is a programming language which is very easy and practical to use for learning programming concepts. To setup Python on your computer, please go through the next section on "Installing Python".
Installing Python
Windows
- Download. You will need to download the installation files from the Python website. To do this, go to http://www.python.org/download/ and download the file called "Python 2.7.x Windows Installer".
Note We will be using version 2.7 of the Python programming language as most code online written in Python will make use of syntax of (or similar to) version 2.7 . There are major changes in version 3.x which we will not get into here.
-
Install. Double click on the python-2.7.x.msi installation file that you have downloaded. This will bring up the installation wizard to help you complete the installation of Python.
-
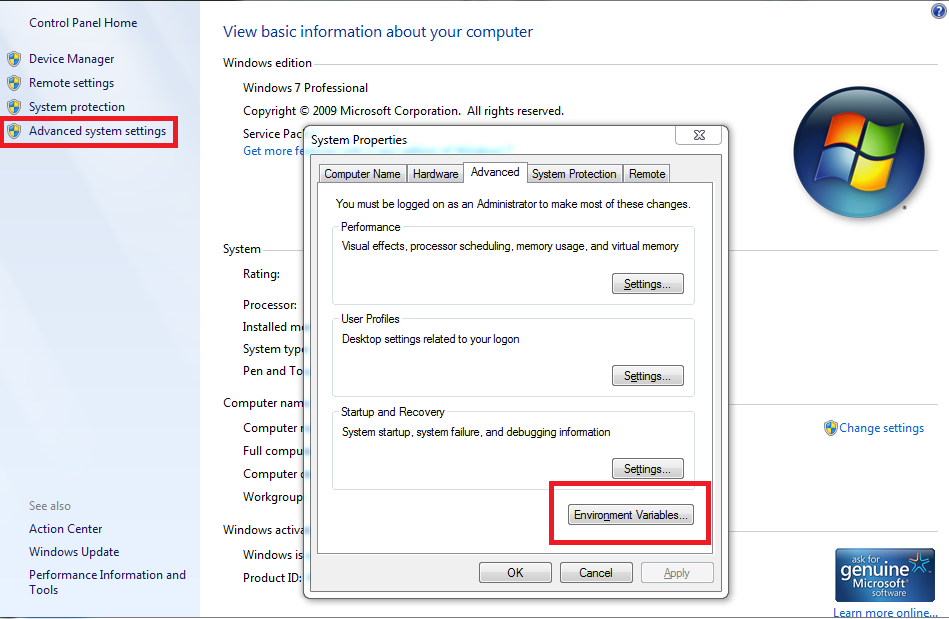
Adjust Environmental Variables. In the windows control panel, open up the "System" settings. Then click on "Advanced system settings". Once the Advanced Settings window has opened, click on the "Environment Variables" button. Select the "PATH" variable and click "Edit ...". Now, add the following text onto the existing text and adjust the location you installed Python to if required
;C:\Python27
Then click "OK" to save the edits. You can now close the various windows that are open.

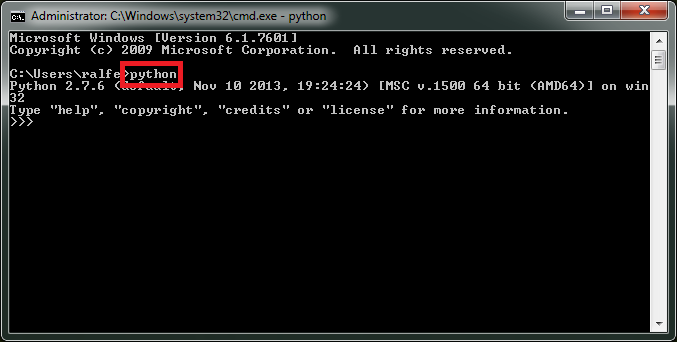
- Test it out. Press Windows Key + R to bring up the "Run Dialogue Box". Type in "cmd" and press enter. The Command Line terminal will now appear. Type in "python" and press enter. You should see the python interactive interpreter appear as in the image below.
Linux
In most linux distributions, you should be able to install Python from the command line simply by using your package manager.
Example (Ubuntu):
sudo apt-get install python
To test it out, run the "python" command at the command line. You should see the python interactive interpreter appear as in the image above.
Code Editor
We will also need a code editor. This is a program in which we can create new text documents which will contain our code, and be able to edit that code. Here are my suggestions for Windows and Linux users:
Windows: Notepad++ (http://notepad-plus-plus.org/download/)
Linux: gedit (this should be installed by default on most Gnome-based distros)
As a last step, you should create a folder somewhere on your PC which is easy to locate in which you will be saving your code.
Running Python Code
To test out your development environment, create a new text document in your code editor with the following code:
print "Hello World!"
Save this file as hello.py
Next, open up the command line and navigate to the directory where hello.py is saved, and run the following command:
python hello.py
You should see Hello World! outputted to the command line.
What now?
Once you have Python installed and working, and have a text editor for editing code, you are ready to get going with the course material. To start us off, we will get a brief overview of the main components of a computer which are useful to understand when writing code.
Exercises
Here are some exercises to help you to start exploring your programming environment.
- Open the command line, and execute the command "python -V" and paste the output in the comments bellow, along with the Operating system you are using (Windows, Mac, Linux).
- On the command line, type echo %cd% (if you are running Windows), or pwd (if you are running Linux). What did the command show you, and why is this useful?
- On the command line, run the command "python -h". Find one option in the output list of "Options and arguments" which you find interesting. Google that option and explain, briefly, what that option does, and how to use it.