Codecs and Containers - Practice [Dec. 16, 2012, 5:53 a.m.]
What Works on the Web
If your eyes haven’t glazed over yet, you’re doing better than most. As you can tell, video (and audio) is a complicated subject — and this was the abridged version! I’m sure you’re wondering how all of this relates to HTML5. Well, HTML5 includes a <video> element for embedding video into a web page. There are no restrictions on the video codec, audio codec, or container format you can use for your video. One <video> element can link to multiple video files, and the browser will choose the first video file it can actually play. It is up to you to know which browsers support which containers and codecs.
As of this writing, this is the landscape of HTML5 video:
| Codecs/container | IE | Firefox | Safari | Chrome | Opera | iPhone | Android |
|---|---|---|---|---|---|---|---|
| Theora+Vorbis+Ogg | · | 3.5+ | † | 5.0+ | 10.5+ | · | · |
| H.264+AAC+MP4 | 9.0+ | · | 3.0+ | 5.0–?‡ | · | 3.0+ | 2.0+ |
| WebM | 9.0+* | · | † | 6.0+ | 10.6+ | · | · |
| * Internet Explorer 9 will only support WebM “when the user has installed a VP8 codec,”. | |||||||
| † Safari will play anything that QuickTime can play. QuickTime comes pre-installed with H.264/AAC/MP4 support. There are installable third-party plugins that add support for Theora and WebM, but each user needs to install these plugins before Safari will recognize those video formats. | |||||||
| ‡ Google Chrome will drop support for H.264 soon. Read about why. |
A year from now, the landscape will look significantly different as WebM is implemented in multiple browsers, those browsers ship non-experimental WebM-enabled versions, and users upgrade to those new versions.
| Codecs/container | IE | Firefox | Safari | Chrome | Opera | iPhone | Android |
|---|---|---|---|---|---|---|---|
| Theora+Vorbis+Ogg | · | 3.5+ | † | 5.0+ | 10.5+ | · | · |
| H.264+AAC+MP4 | 9.0+ | · | 3.0+ | · | · | 3.0+ | 2.0+ |
| WebM | 9.0+ | 4.0+ | † | 6.0+ | 10.6+ | · | 2.3‡ |
| † Safari will play anything that QuickTime can play, but QuickTime only comes with H.264/AAC/MP4 support pre-installed. | |||||||
| ‡ Although Android 2.3 supports WebM, there are no hardware decoders yet, so battery life is a concern. |
Professor Markup Says
There is no single combination of containers and codecs that works in all HTML5 browsers.
This is not likely to change in the near future.
To make your video watchable across all of these devices and platforms, you’re going to need to encode your video more than once.
For maximum compatibility, here’s what your video workflow will look like:
- Make one version that uses WebM (VP8 + Vorbis).
- Make another version that uses H.264 baseline video and AAC “low complexity” audio in an MP4 container.
- Make another version that uses Theora video and Vorbis audio in an Ogg container.
-
Link to all three video files from a single
<video>element, and fall back to a Flash-based video player.
Licensing Issues with H.264 Video
What is a Free codec?
Besides having an open specification that allows anyone to implement there own player, encoder or other tool to encode or decode videos in a free codec. It is important that this can be done without requiring a special contract or patent agreement. While H264 is a big step forward compared to proprietary codecs owned by a single vendor like Real or Microsoft, it still requires anyone implementing an encoder or decoder and even anyone distributing a video in h264 to pay license fees for patents covering algorithms used in the codec to do so. For videos distributed on the web for free this has been removed but if you sell or distribute videos on disks or broadcast you need to pay up. Free codecs like Ogg Theora or WebM dont have such restrictions. The allow anyone to freely create tools and distribute content as they like.
For more info you can read this article about ThetH.264 Licensing Labyrinth
Encoding Video With Miro Video Converter
There are many tools for encoding video, and there are many video encoding options that affect video quality. If you do not wish to take the time to understand anything about video encoding, this section is for you.
Miro Video Converter is an open source, GPL-licensed program for encoding video in multiple formats. Download it for Mac OS X or Windows. It supports all the output formats mentioned in this chapter. It offers no options beyond choosing a video file and choosing an output format. It can take virtually any video file as input, including DV video produced by consumer-level camcorders. It produces reasonable quality output from most videos. Due to its lack of options, if you are unhappy with the output, you have no recourse but to try another program.
To start, just launch the Miro Video Converter application.
Miro Video Converter main screen
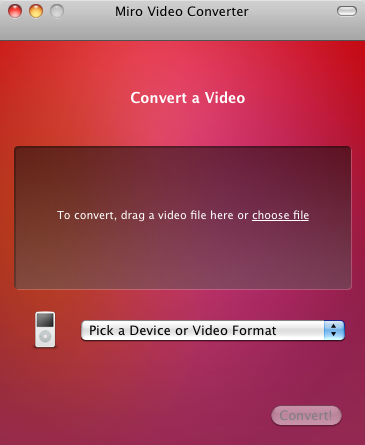
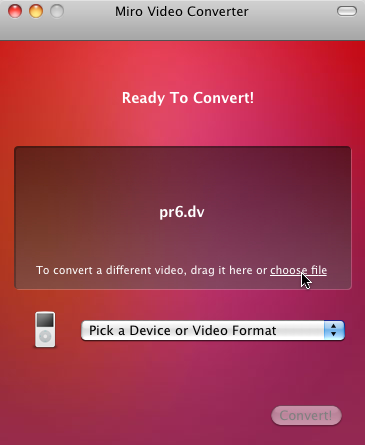
Click “Choose file” and select the source video you want to encode.
“Choose file”
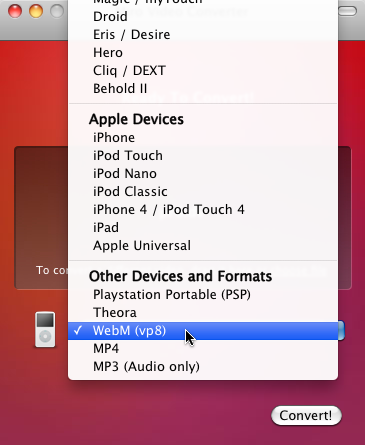
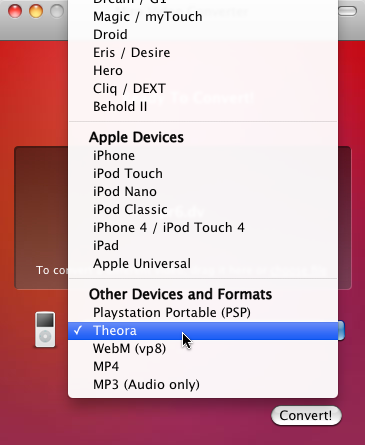
The “Pick a Device or Video Format” dropdown menu lists a variety of devices and formats. For the purposes of this chapter, we are only interested in three of them.
- WebM (vp8) is WebM video (VP8 video and Vorbis audio in a WebM container).
- Theora is Theora video and Vorbis audio in an Ogg container.
- iPhone is H.264 Baseline Profile video and AAC low-complexity audio in an MP4 container.
Select “WebM” first.
Choosing WebM output
Click the “Convert” button and Miro Video Converter will immediately start encoding your video. The output file will be named SOURCEFILE.webm and will be saved in the same directory as the source video.
You’ll be staring at this screen
for a long time

Once the encoding is complete, you’ll be dumped back to the main screen. This time, select “Theora” from the Devices and Formats list.
Time for Theora
That’s it; press the “Convert” button again to encode your Theora video. The video will be named SOURCEFILE.theora.ogv and will be saved in the same directory as the source video.
Time for a cup of coffee

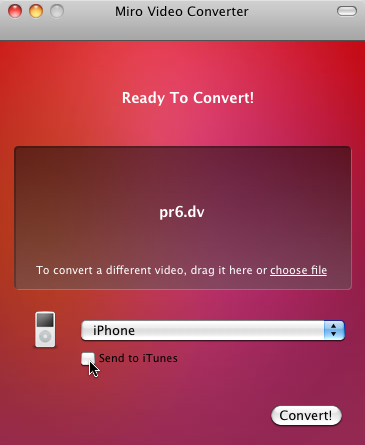
Finally, encode your iPhone-compatible H.264 video by selecting “iPhone” from the Devices and Formats list.
iPhone, not iPhone 4

For iPhone-compatible video, Miro Video Converter will give you an option to send the encoded file to your iTunes library. I have no opinion on whether you would want to do that, but it’s not necessary for publishing video on the web.
Don’t send to iTunes
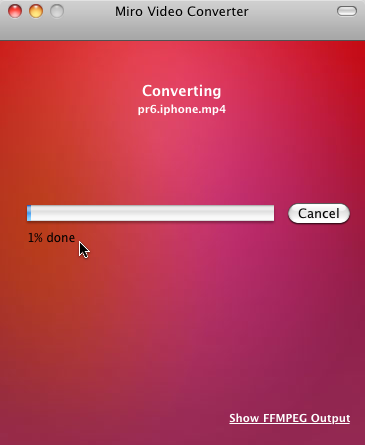
Press the magical “Convert” button and wait. The encoded file will be named SOURCENAME.iphone.mp4 and will be saved in the same directory as the source video.
Do some yoga or something
You should now have three video files alongside your original source video. If you’re satisfied with the video quality, skip ahead to At Last, The Markup to see how to assemble them into a single <video> element that works across browsers. If you’d like to learn more about other tools or video encoding options, read on.
Encoding Ogg Video with Firefogg
(In this section, I’m going to use “Ogg video” as a shorthand for “Theora video and Vorbis audio in an Ogg container.” This is the combination of codecs+container that works natively in Mozilla Firefox and Google Chrome.)
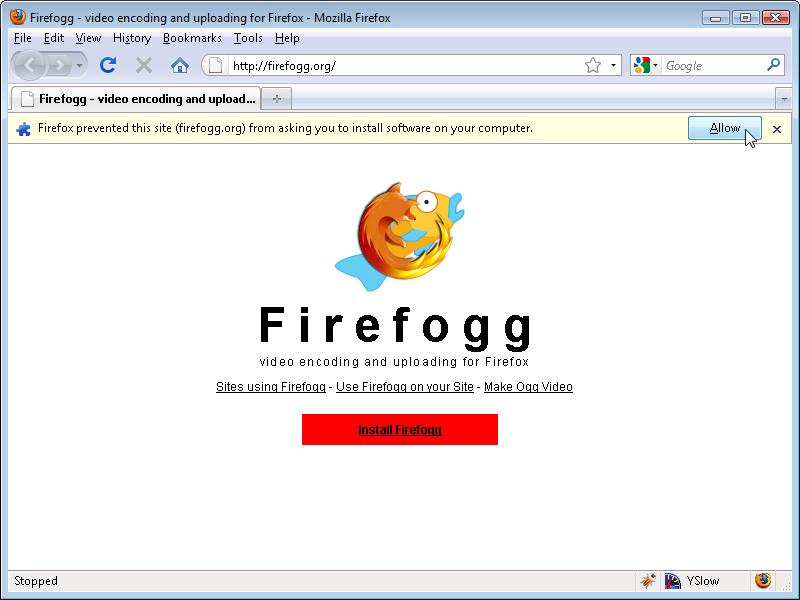
Firefogg is an open source, GPL-licensed Firefox extension for encoding Ogg video. To use it, you’ll need to install Mozilla Firefox 3.5 or later, then visit firefogg.org.
Firefogg home page

Click “Install Firefogg.” Firefox will prompt whether you really want to allow the site to install an extension. Click “Allow” to continue.
Allow Firefogg to install
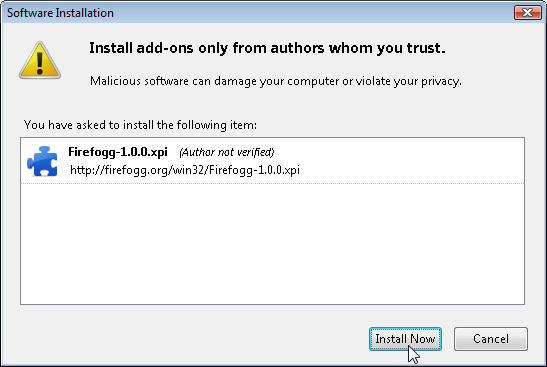
Firefox will present the standard software installation window. Click “Install” to continue.
Install Firefogg
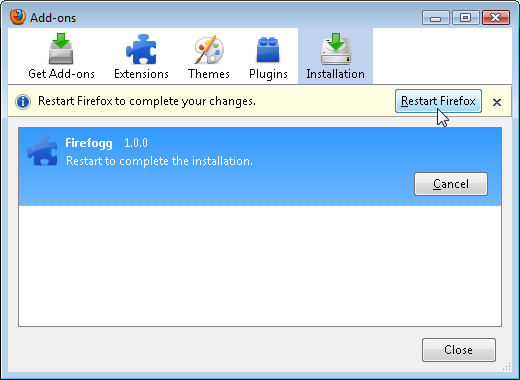
Click “Restart Firefox” to complete the installation.
Restart Firefox
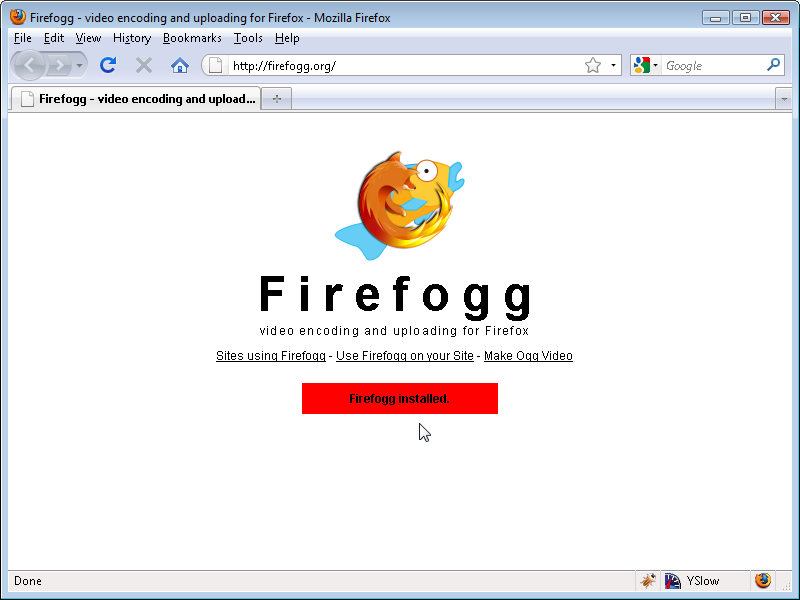
After restarting Firefox, firefogg.org will confirm that Firefogg was successfully installed.
Installation successful
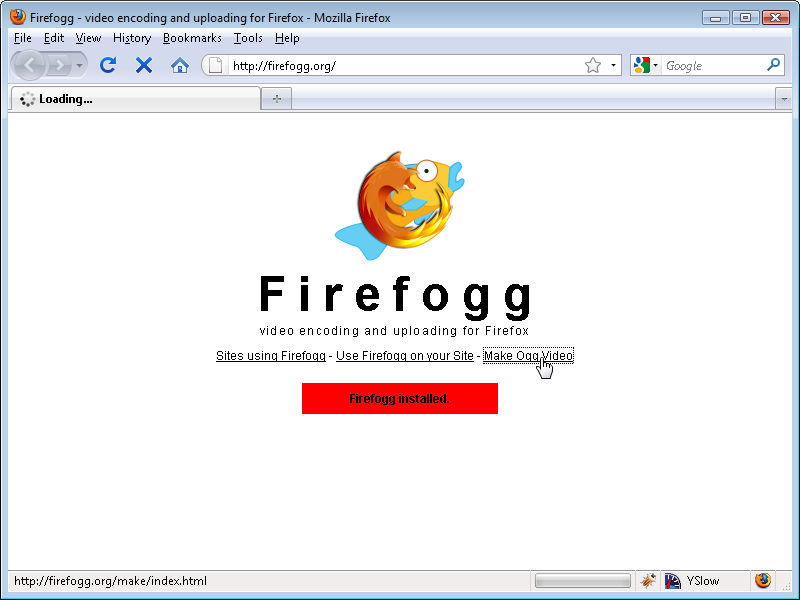
Click “Make Ogg Video” to start the encoding process.
Let’s make some video!
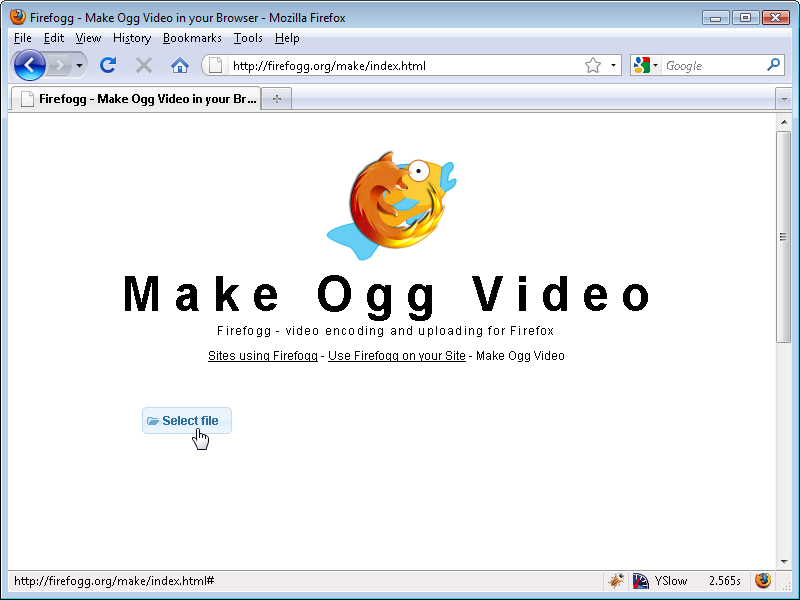
Click “Select file” to select your source video.
Select your video file
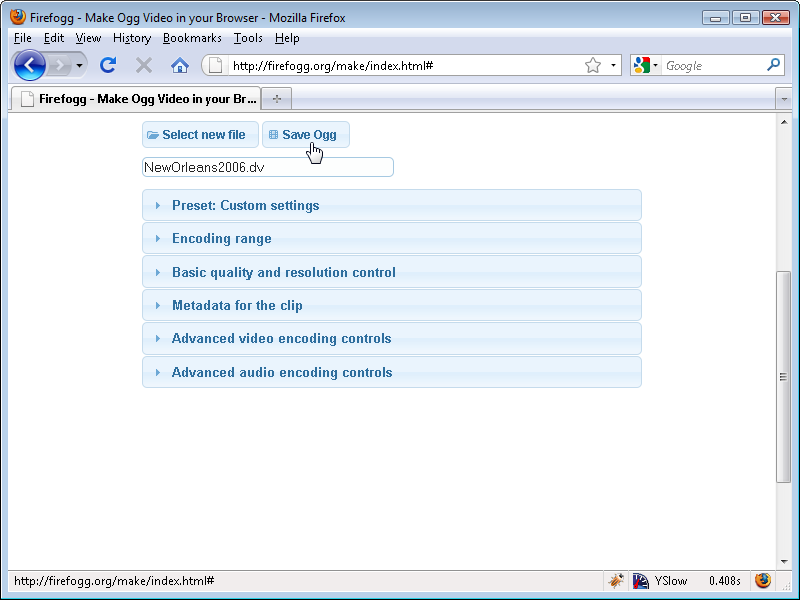
Firefogg has six “tabs”:
- Presets. The default preset is “web video,” which is fine for our purposes.
- Encoding range. Encoding video can take a long time. When you’re first getting started, you may want to encode just part of your video (say, the first 30 seconds) until you find a combination of settings you like.
- Basic quality and resolution control. This is where most of the important options are.
- Metadata. I won’t cover it here, but you can add metadata to your encoded video like title and author. You’ve probably added metadata to your music collection with iTunes or some other music manager. This is the same idea.
- Advanced video encoding controls. Don’t mess with these unless you know what you’re doing. (Firefogg offers interactive help on most of these options. Click the “i” symbol next to each option to learn more about it.)
- Advanced audio encoding controls. Again, don’t mess with these unless you know what you’re doing.
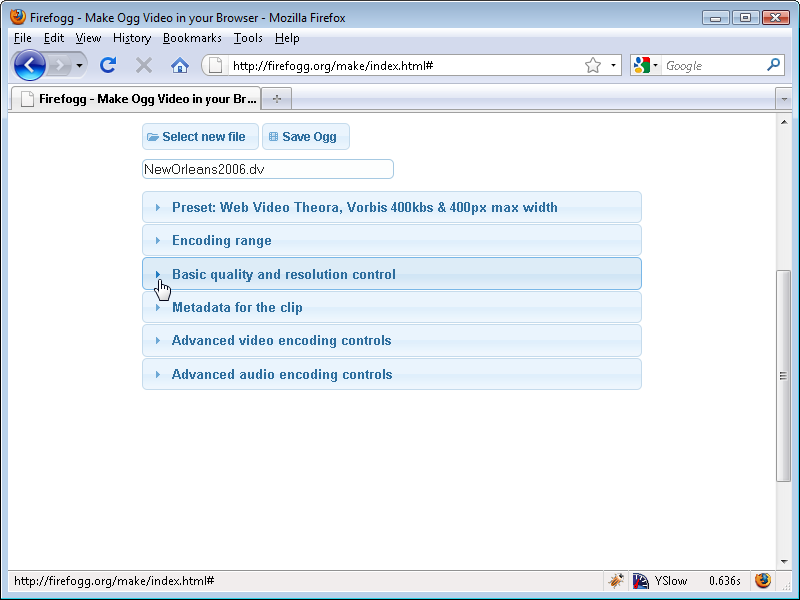
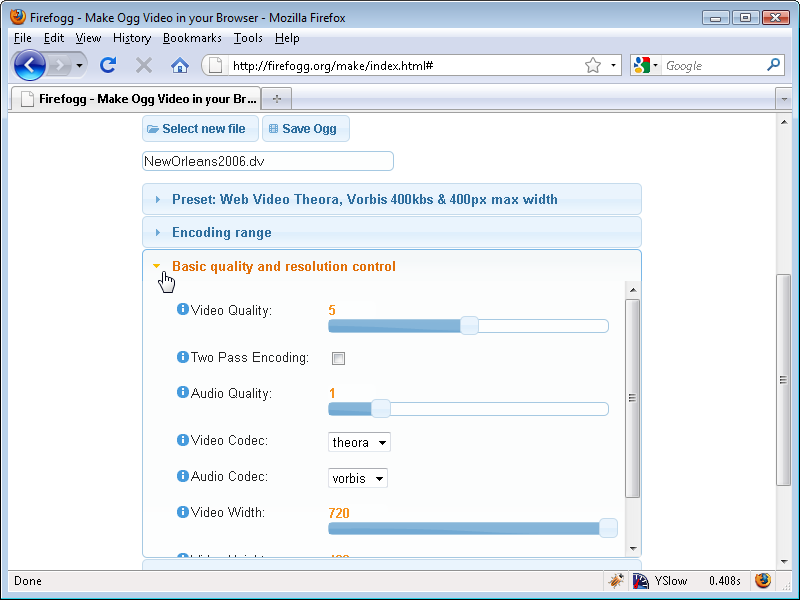
The only options I’m going to cover are in the “Basic quality and resolution control” tab. It contains all the important options:
- Video Quality. This is measured on a scale of 0 (lowest quality) to 10 (highest quality). Higher numbers mean bigger file sizes, so you’ll need to experiment to determine the best size/quality ratio for your needs.
- Audio Quality. This is measured on a scale of -1 (lowest quality) to 10 (highest quality). Higher numbers mean bigger file sizes, just like the video quality setting.
- Video Codec. This should always be “theora.”
- Audio Codec. This should always be “vorbis.”
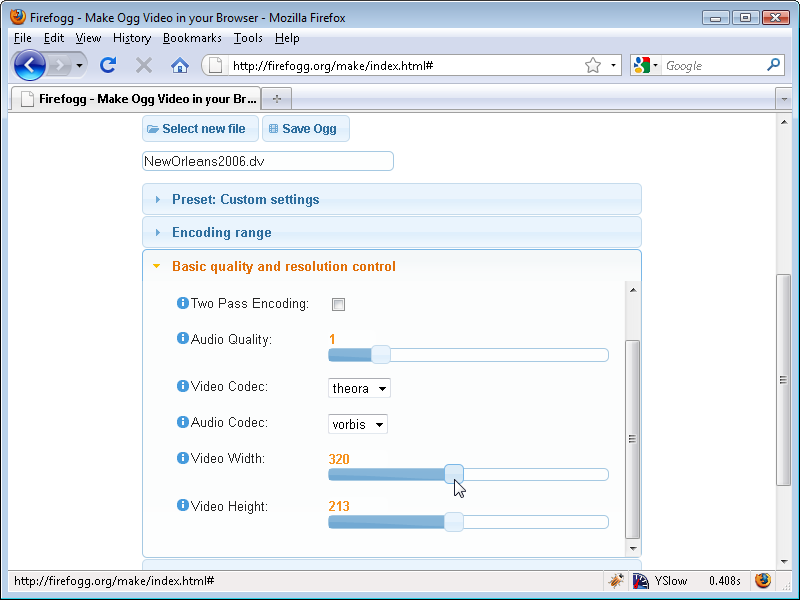
- Video Width and Video Height. These defaults to the actual width and height of your source video. If you want to resize the video during encoding, you can change the width (or height) here. Firefogg will automatically adjust the other dimension to maintain the original proportions (so your video won’t end up smooshed or stretched).
In this example, I’m going to resize the video to half its original width. Notice how Firefogg automatically adjusts the height to match.
Adjust video width and height
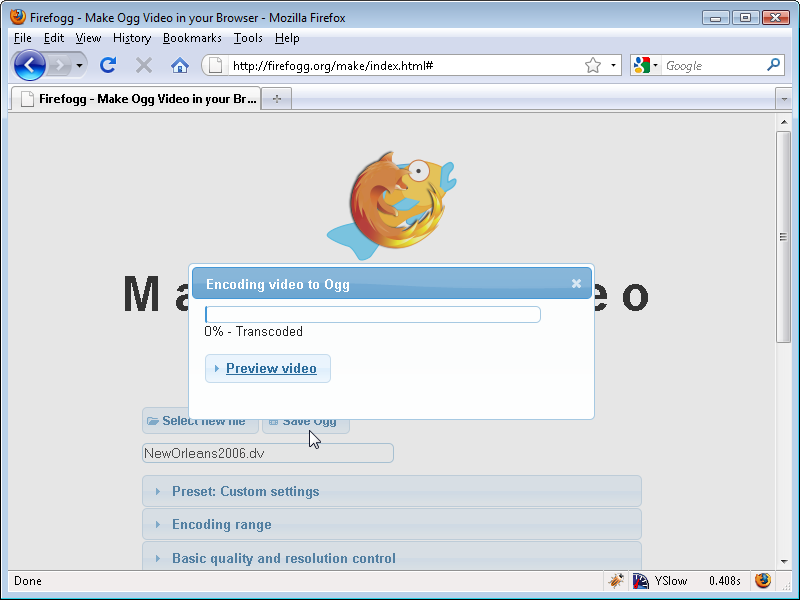
Once you’ve fiddled with all the knobs, click “Save Ogg” to start the actual encoding process. Firefogg will prompt you for a filename for the encoded video.
“Save Ogg”
Firefogg will show a nice progress bar as it encodes your video. All you need to do is wait (and wait, and wait)!
Encoding in progress